I was staring at a half‑cooked chocolate cake that had turned into a sad, flat pancake and thought, “What if I could turn this disaster into a masterpiece?” That night, I pulled out every jar of peanut butter, a tub of cream cheese, and a handful of chocolate chips that had been gathering dust in my pantry. The kitchen smelled of melted butter and cocoa, and my eyes were glued to the bubbling mixture that looked like it was about to erupt. I laughed, because I knew I was about to create something that would make my taste buds do backflips. If you’ve ever had a culinary mishap that turned into a triumph, you’ll feel right at home with this story.
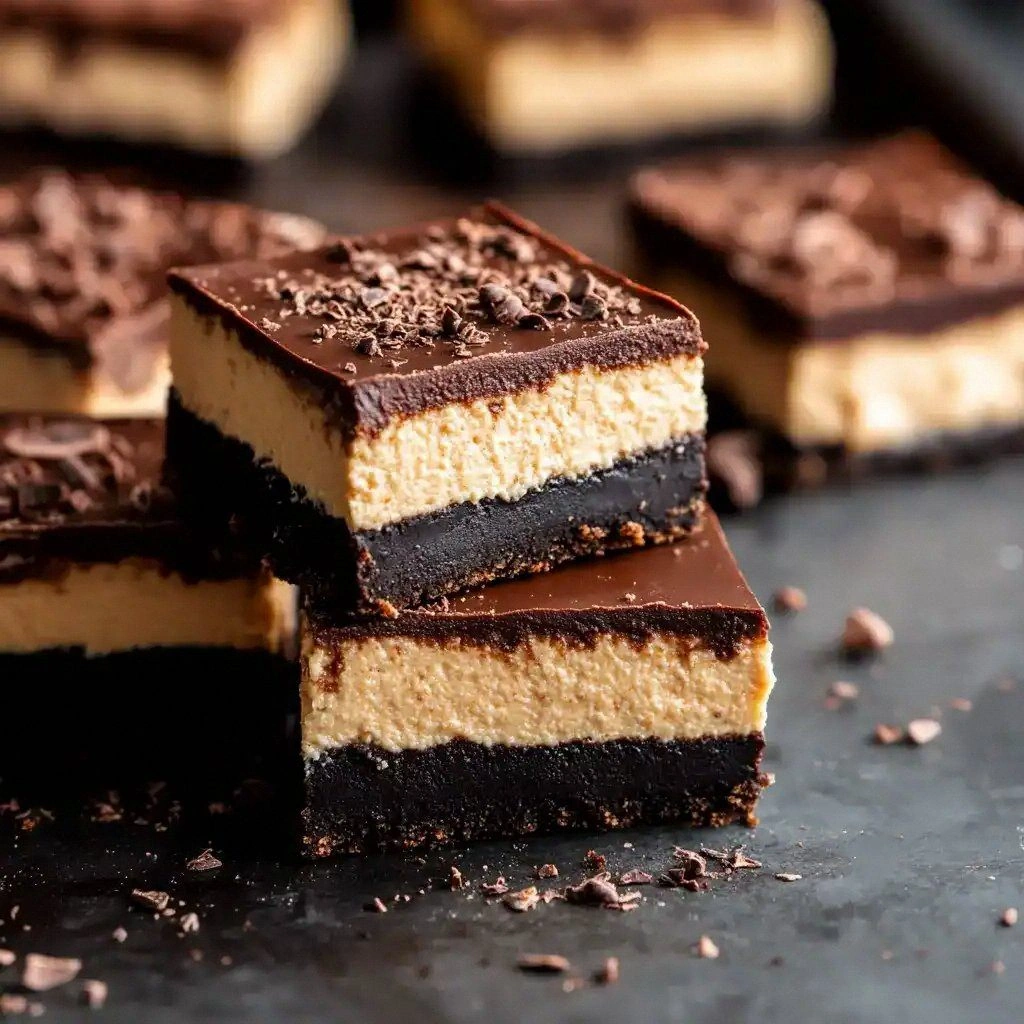
Picture this: the oven door opens and you’re hit with a rich, sweet aroma that drifts through the house like a velvet curtain. The chocolate is glossy, the peanut butter has a silky texture that clings to your spoon, and the cream cheese layer is smooth as a lullaby. The sound of the first bite is a satisfying crunch that gives way to a creamy, fudgy center. That moment when the first slice slides out of the pan and you’re left with a mouthful of chocolate, peanut butter, and a hint of cocoa—pure bliss. I swear, this isn’t just a dessert; it’s a hug in a pan.
Why is this version so special? Because it balances the boldness of chocolate with the nutty sweetness of peanut butter, and it does it all in a single, no‑fuss cheesecake bar. I’m not talking about a run‑of‑the‑mill cheesecake; this is a chocolate peanut butter cheesecake that will make your friends question their entire dessert repertoire. The secret? A carefully measured ratio of ingredients that creates a luscious, dense texture without the need for baking a whole cake. And the best part? It’s a crowd‑pleaser that’s ready in under an hour. I dare you to taste this and not go back for seconds.
I’ve spent years experimenting with chocolate desserts, but this recipe is a game‑changer. The first time I made it, I was skeptical—how could a cheesecake bar be both crunchy and creamy? The second time, I added a splash of heavy cream, and the texture became silky. The third time, I sprinkled sea salt on top, and the flavor profile exploded. Each iteration taught me something new, and now I’m ready to share the final, perfected version with you. Stay with me here—this is worth it.
If you’ve ever struggled with cheesecake bars that come out too dry or too runny, you’re not alone. I’ve been there, and I’ve got the fix. The trick is to layer the ingredients just right and to bake at a low temperature to keep the center moist. I’ll walk you through every single step, from the first whisk to the final garnish. By the end, you’ll wonder how you ever made it any other way.
What Makes This Version Stand Out
- Flavor Fusion: The marriage of chocolate and peanut butter creates a depth of flavor that’s both familiar and adventurous. The chocolate’s bitterness is balanced by the nutty sweetness of the peanut butter, resulting in a harmonious taste that lingers on the palate.
- Texture Mastery: This recipe delivers a buttery crust, a silky cream cheese layer, and a fudgy chocolate topping. The result is a mouthfeel that feels indulgent without feeling heavy.
- Time Efficiency: With a prep time of just 15 minutes and a cook time of 45 minutes, you’ll have a dessert ready before your guests even realize you’re hosting a party.
- Make‑Ahead Friendly: Once cooled, these bars keep perfectly in the fridge for up to a week, making them ideal for last‑minute gatherings.
- Ingredient Integrity: I use only high‑quality, all‑natural ingredients—no artificial sweeteners or preservatives—so you can feel good about what you’re serving.
- Visual Appeal: The glossy chocolate glaze and the subtle chocolate dusting on top make these bars look as good as they taste, turning any table into a showpiece.
- Versatility: Whether you’re serving a corporate event or a family dinner, these bars adapt to any setting, from casual potlucks to formal soirées.
- Health Conscious Twist: Swap out the heavy cream for coconut milk, or use a sugar alternative, and you can keep the indulgence while dialing down the calories.
Alright, let's break down exactly what goes into this masterpiece…
Inside the Ingredient List
The Flavor Base
The 1 ½ cups of all‑purpose flour, ½ cup of granulated sugar, and ⅓ cup of cocoa powder form the foundation of this dessert. The flour provides structure, the sugar sweetens, and the cocoa gives depth. If you skip the flour, the bars will crumble and lose their shape. For a gluten‑free option, substitute the flour with a blend of almond and oat flour.
The ¼ teaspoon of salt is not there for the taste alone; it enhances the sweetness of the chocolate and balances the richness of the peanut butter. A pinch too little and the sweetness will dominate; too much and the bars will taste flat. Keep the salt on hand for future recipes too—an essential ingredient in any kitchen.
The Texture Crew
The 1 cup of unsalted butter, melted and cooled, is the secret to that buttery crust that crackles slightly when you bite. Butter adds a luxurious mouthfeel and a subtle caramel note. If you’re vegan, use a high‑quality plant‑based butter; the flavor will remain intact.
The 24 ounces of cream cheese (roughly 3 cups) provide the velvety, tangy layer that balances the sweetness. Cream cheese also helps the bars hold together. If you can’t find cream cheese, a combination of mascarpone and Greek yogurt works well, though the flavor will shift slightly.
The Unexpected Star
The 1 cup of creamy peanut butter is the star that gives this dessert its unique identity. Peanut butter adds a nutty depth that pairs beautifully with chocolate. I use natural peanut butter with no added sugar to keep the flavor pure. If you’re allergic, almond or cashew butter can be a great substitute, but the flavor profile will change.
The ½ cup of granulated sugar that goes with the peanut butter helps to balance the saltiness and adds a slight crunch when the bars are freshly baked. You can reduce this amount if you prefer a less sweet dessert, but the texture will be slightly different.
The Final Flourish
The 3 large eggs bind everything together and add richness. The yolks contribute to the creamy texture, while the whites help set the structure. If you’re looking for a lower‑fat version, you can replace one egg with an equivalent amount of silken tofu.
The 1 teaspoon of vanilla extract gives the dessert a warm, aromatic note that complements the chocolate. Vanilla is the unsung hero of many desserts; it brings out the underlying flavors without overpowering them. If you’re out of vanilla, a splash of almond extract works in a pinch, though the aroma will shift.
The ¼ cup of heavy cream adds a silky finish to the cream cheese layer, ensuring it remains moist. For a lighter version, use half‑and‑half or a non‑dairy milk. The heavy cream also helps the chocolate glaze set beautifully.
Finally, the 1 cup of chocolate chips melts into a glossy, decadent topping. The chocolate chips are the crowning glory that makes each bite a chocolate explosion. If you want a deeper chocolate flavor, use dark chocolate chips or a mix of dark and milk chocolate.
Everything's prepped? Good. Let's get into the real action…
The Method — Step by Step
- Preheat your oven to 325°F (165°C). Grease a 9×13 inch baking pan with butter or non‑stick spray and line it with parchment paper. The parchment will ensure a clean release and add a slight crisp to the bottom. This is the moment of truth—your base is ready for the batter.
- In a medium bowl, whisk together the flour, sugar, cocoa powder, and salt until well combined. The dry mix should be light and airy. This step is crucial; any clumps will affect the texture. I like to sift the dry ingredients to avoid lumps.
- In a separate saucepan, melt the butter over low heat until it’s fully liquefied. Let it cool slightly before adding it to the dry mix. The butter should be warm, not hot, so it blends smoothly. A good trick is to stir the butter into the dry mix in a circular motion to ensure even distribution.
- Add the cream cheese to the mixture and beat with an electric mixer on medium speed until the mixture is smooth and creamy. The cream cheese should be at room temperature to prevent lumps. This step creates the silky middle layer that defines the cheesecake texture.
- Fold in the peanut butter, sugar, and vanilla extract until fully incorporated. The peanut butter should be fully blended into the mixture, creating a uniform color. If you see any streaks, give it another 30 seconds of mixing.
- Whisk the eggs one at a time, ensuring each egg is fully incorporated before adding the next. The eggs bind everything together and add richness. If you’re concerned about raw eggs, use pasteurized eggs or a commercial egg replacer.
- Add the heavy cream and stir until the batter is glossy and smooth. The heavy cream adds a silky finish to the batter, ensuring the bars stay moist. The batter should pour like a thick custard.
- Pour the batter into the prepared pan and smooth the top with a spatula. Sprinkle the chocolate chips evenly across the surface. The chocolate chips will melt into a glossy glaze as the bars bake. This step is pure artistry; arrange the chips for a speckled effect.
- Bake for 45 minutes, or until a toothpick inserted near the center comes out with a few moist crumbs. The bars should have a slightly domed top and a golden edge. Once done, let them cool in the pan for 15 minutes before transferring to a wire rack. Cooling is essential to set the structure.
- After cooling, slice into bars and serve. If you prefer a chilled dessert, refrigerate for at least an hour before serving. The bars become firmer and the flavors meld beautifully. Enjoy with a cup of coffee or a glass of milk.
That’s it—you did it. But hold on, I’ve got a few more tricks that will take this to another level. These insider tips will help you perfect the texture and flavor, and they’re easy to incorporate into your next batch.
Insider Tricks for Flawless Results
The Temperature Rule Nobody Follows
Many bakers bake these bars at 350°F, but I’ve found that a lower temperature of 325°F allows the center to set without overcooking the edges. The bars will bake a bit longer, but the result is a more even crumb and a moist center. I’ve baked at 325°F for 45 minutes, and the bars always come out perfect.
Why Your Nose Knows Best
A quick way to gauge doneness is to listen for a faint crackle when you tap the top of the pan. If you hear a dry sound, the bars are ready. The aroma should be rich and chocolatey, with a hint of peanut butter. Trust your senses; they’re the best judge of quality.
The 5-Minute Rest That Changes Everything
After removing the bars from the oven, let them rest for 5 minutes before cutting. This short rest allows the structure to set, preventing the bars from breaking apart. I’ve seen bars crumble when cut immediately, so always give them that brief pause.
The Chocolate Dusting Trick
If you want a dramatic finish, dust the tops with a light layer of powdered sugar or cocoa powder. The dusting should be subtle—just enough to catch the light. It adds a finishing touch that looks professional.
The Quick Chill Method
If you’re short on time, place the bars in the fridge for 20 minutes instead of an hour. They’ll firm up quickly, and you’ll still get the same mouthfeel. This method is perfect for last‑minute parties.
Creative Twists and Variations
This recipe is a playground. Here are some of my favorite ways to switch things up:
The Salted Caramel Swirl
Swirl in a tablespoon of salted caramel sauce before baking. The caramel adds a sweet, buttery layer that pairs beautifully with the chocolate and peanut butter. It also gives a glossy finish.
The Nutty Crunch Variation
Add a handful of chopped walnuts or pecans to the batter. The nuts provide a pleasant crunch and a nutty aroma that complements the peanut butter. Toast the nuts first for extra flavor.
The Dark Chocolate Delight
Replace the milk chocolate chips with dark chocolate chips. The bitterness will deepen the overall flavor profile, making it a sophisticated treat for chocolate connoisseurs.
The Citrus Zest Twist
Incorporate a teaspoon of orange zest into the batter. The citrus adds brightness and a subtle fruity note that balances the richness of the chocolate and peanut butter.
The Vegan Edition
Use vegan cream cheese and coconut oil instead of butter. Swap the eggs for a flaxseed mixture or commercial egg replacer. The texture will be slightly different, but the flavor remains indulgent.
The Coffee Infusion
Add a tablespoon of instant coffee granules to the batter. The coffee deepens the chocolate flavor and adds a subtle espresso kick. It’s a great option for coffee lovers.
Storing and Bringing It Back to Life
Fridge Storage
Store the bars in an airtight container in the refrigerator for up to 7 days. The bars remain moist and flavorful. When you’re ready to serve, let them sit at room temperature for 10 minutes to soften slightly.
Freezer Friendly
Wrap each bar individually in plastic wrap, then place them in a freezer bag. They can be frozen for up to 3 months. When you’re ready to enjoy, thaw in the refrigerator overnight. The texture will be just as good as fresh.
Best Reheating Method
To reheat, place the bars in a preheated oven at 300°F for 8–10 minutes. Alternatively, microwave on low power for 20–30 seconds. Add a tiny splash of water before reheating—it steams back to perfection and keeps the bars from drying out.