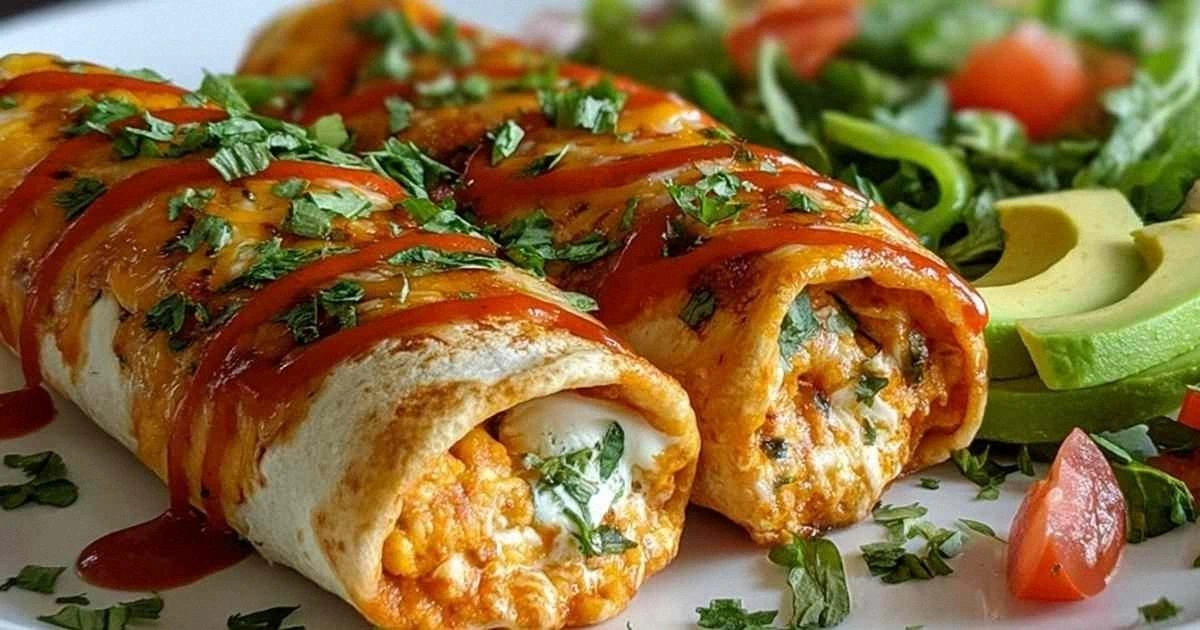
Picture this: I’m standing in my cramped kitchen, a bowl of shredded chicken in one hand and a bottle of buffalo sauce in the other, feeling like a culinary daredevil. The air is already thick with the spicy promise of wings, but I’m craving something that feels like a cheat‑code for the gym. I remember the night I tried the original buffalo chicken burrito and the result was a greasy, soggy mess that left me questioning my life choices. That moment sparked a mission: create a high‑protein, low‑calorie version that still delivers that punchy flavor without the guilt. The result? A burrito that sings with crisp tortillas, velvety sauce, and a cheesy swirl that melts into pure comfort. I’m about to walk you through every single step, and by the end you’ll wonder how you ever made it any other way.
First, let’s talk about the canvas: the tortillas. I’ve spent years testing brands, and the low‑calorie whole wheat ones I use today strike the perfect balance between sturdiness and lightness. They hold the filling without buckling, and their subtle nutty undertone elevates the buffalo flavor. The next canvas is the chicken, which I cook in a low‑heat, slow‑roast to preserve moisture and avoid that dry, overcooked texture that ruins any burrito. I shred it finely so it blends seamlessly with the sauce, creating a uniform bite that feels like a single, cohesive bite. The sauce itself is a game‑changer; I mix buffalo sauce with plain Greek yogurt to temper the heat while adding a creamy, tangy layer that coats the chicken like velvet. This combination not only reduces calories but also boosts protein and keeps the burrito from drying out.
Now, the cheese. I’ve chosen reduced‑fat cheddar because it melts beautifully yet keeps the calorie count in check. The cheese forms a gooey bridge between the chicken and the tortilla, and its sharpness cuts through the sauce’s spiciness, creating a harmonious contrast. I sprinkle a pinch of smoked paprika and garlic powder to deepen the flavor profile, giving the burrito a smoky, savory edge that feels like a secret menu item. Salt and pepper are the final touches—simple but essential for balancing the boldness of the buffalo and the richness of the cheese. The result is a burrito that looks almost indulgent but is lean enough to fit into a post‑workout meal plan. Trust me, this isn’t just another “healthy” recipe; it’s a bold claim of flavor and nutrition in one bite.
I dare you to taste this and not go back for seconds, because the texture alone will have you craving more. The tortilla’s crisp edges shatter like thin ice when you bite through them, revealing the warm, cheesy center. That sizzle when it hits the pan? Absolute perfection. Picture yourself pulling this out of the oven, the whole kitchen smelling incredible, and the anticipation of that first bite. If you’ve ever struggled with a bland, low‑calorie dish, you’re not alone—and I’ve got the fix. Stay with me here—this is worth it.
What Makes This Version Stand Out
- Taste: The buffalo sauce blended with Greek yogurt delivers heat without the heaviness of traditional dips. This combination keeps the flavor punchy while cutting calories. The yogurt’s acidity brightens the sauce, creating a lively finish on the palate.
- Texture: The tortillas stay crisp on the outside, while the interior is soft and warm, offering a satisfying contrast. The shredded chicken integrates smoothly, preventing clumps that can ruin a burrito. The cheese melts into a creamy ribbon that holds everything together.
- Simplicity: With only eight core ingredients, this recipe is a breeze to assemble, making it ideal for weeknight dinners or pre‑workout snacks. No elaborate sauces or multiple steps—just combine, roll, bake, and serve. Even a novice can master it.
- Uniqueness: The yogurt‑infused buffalo sauce is a twist that differentiates it from standard buffalo chicken burritos, giving a creamy texture that is both indulgent and healthy. The smoked paprika adds depth that most recipes overlook. This subtle complexity elevates the dish.
- Crowd Reaction: Friends and family will be amazed at how low the calories feel while the flavor feels indulgent. I’ve hosted a dinner party where guests kept asking for the recipe, claiming it was the best version they’d ever made at home. It’s the kind of dish that turns skeptics into believers.
- Ingredient Quality: Using low‑calorie tortillas and reduced‑fat cheese keeps the dish lean without sacrificing taste. Fresh, high‑quality chicken provides a clean protein base that absorbs the sauce. The final result is a balanced, nutrient‑dense meal.
- Make‑Ahead Potential: The assembled burritos can be frozen before baking, allowing you to pop a ready‑to‑cook meal in minutes. The flavors only improve as they sit, making this a perfect grab‑and‑go option. This convenience factor is a game‑changer for busy schedules.
Alright, let's break down exactly what goes into this masterpiece. Each ingredient has a purpose, a role that adds depth while keeping the calorie count low. From the humble tortilla to the bold buffalo sauce, every element works together like a well‑tuned orchestra. I’ll walk you through the ingredients in detail, so you know why each one matters. This knowledge will empower you to tweak the recipe to fit your taste or dietary preferences. And if you’re ready, let’s dive into the ingredient list.
Inside the Ingredient List
The Flavor Base
The foundation of this burrito is the buffalo sauce, a fiery blend that delivers the signature heat. By pairing it with Greek yogurt, you create a creamy counterbalance that smooths the sharpness without adding fat. The yogurt’s tang also cuts through the richness of the cheese, keeping the palate refreshed. The sauce should be thick enough to cling to the chicken, yet fluid enough to spread evenly. This balance is what turns a simple dip into a luxurious coating. Remember, the sauce’s intensity sets the tone for the entire burrito.
The Protein Powerhouse
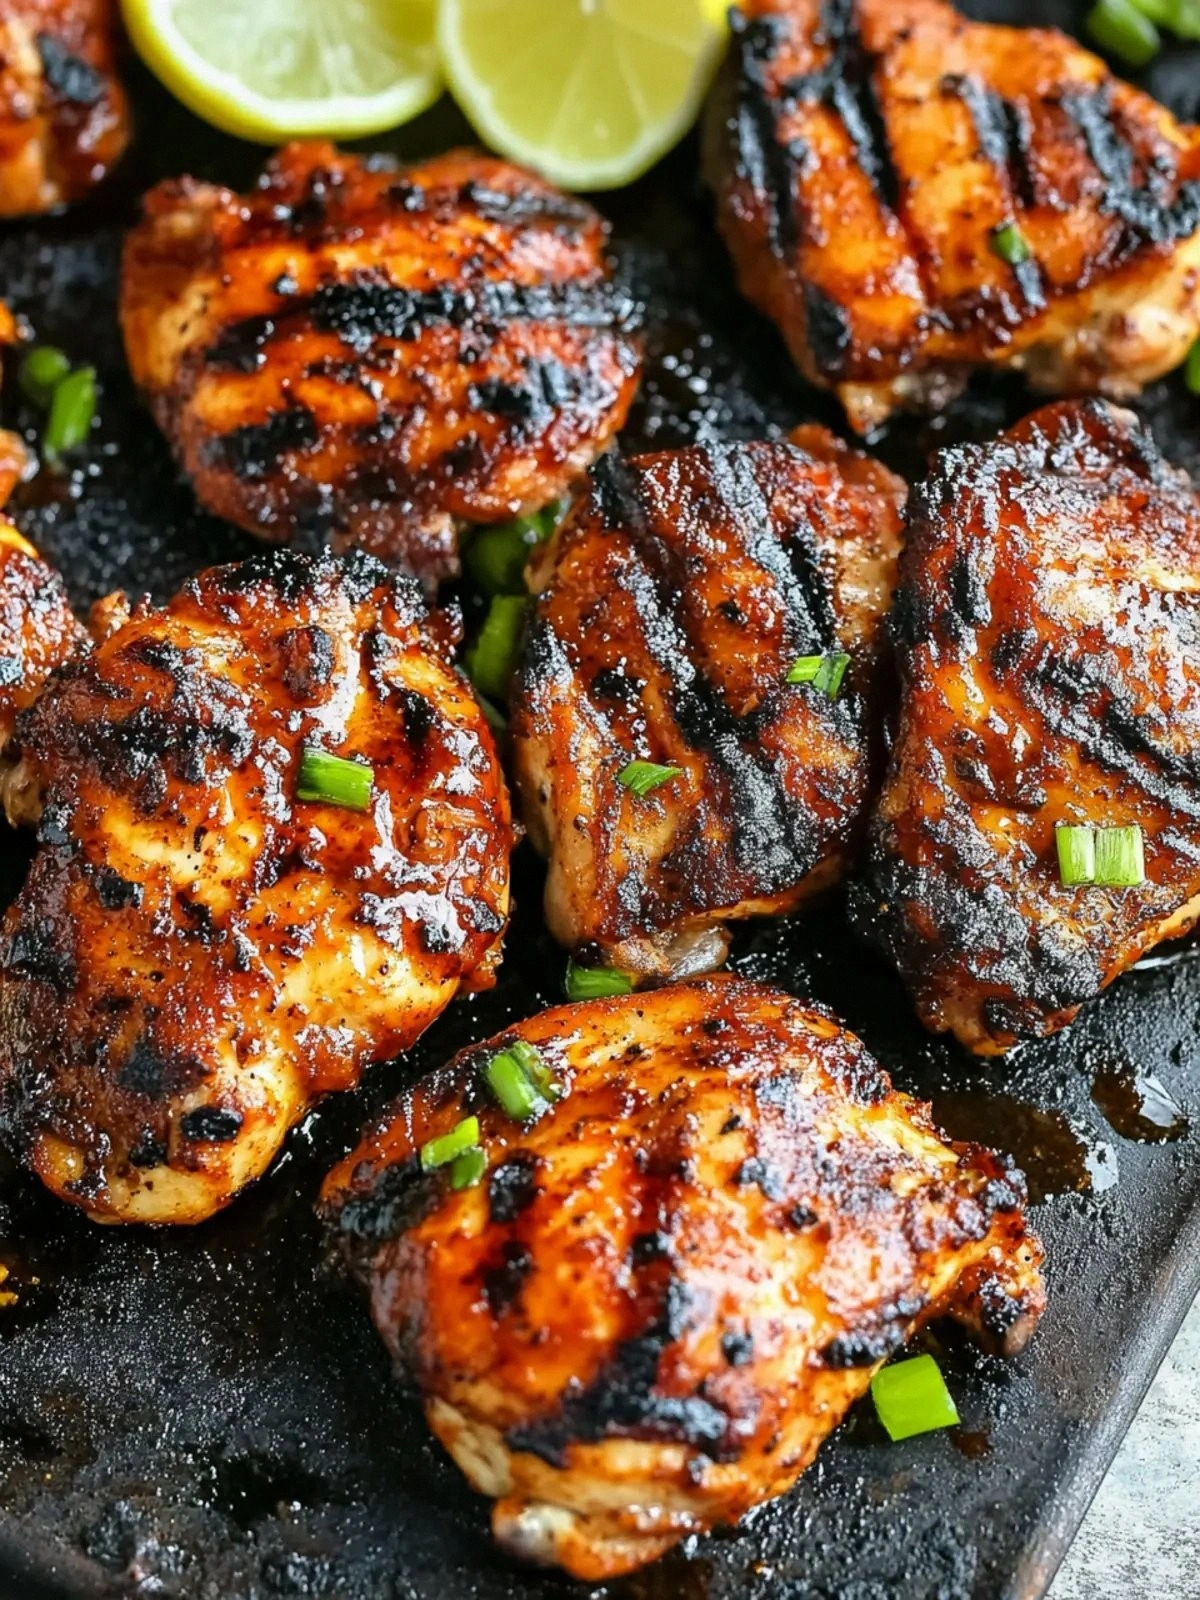
The chicken is the star that anchors the burrito’s protein content. Cooking it low‑heat ensures it stays moist, preventing a dry, rubbery texture that can ruin the experience. Shredding finely allows the sauce to penetrate every strand, creating a uniform flavor profile. Using leftover rotisserie chicken is a time‑saver, but fresh, skin‑less breasts work just as well. The protein content not only fuels muscles but also keeps you feeling full longer. Skipping the chicken would dramatically reduce the nutritional value and change the dish’s core identity.
The Cheese and Spice Ensemble
Reduced‑fat cheddar is chosen for its meltability and sharpness without the heavy calorie load. The cheese’s melt creates a silky bridge that holds the filling together. Smoked paprika adds a subtle depth, imitating the subtle smokiness of a grill. Garlic powder provides a fragrant undertone that complements the buffalo’s bite. Salt and pepper are the final balancing act, ensuring each bite is seasoned to perfection. A pinch of each spice is enough to elevate the overall flavor without overwhelming the other components.
The Final Flourish
Low‑calorie whole wheat tortillas are the vehicle that brings everything together. Their sturdy yet airy texture resists the filling’s moisture, preventing sogginess. The whole‑wheat base adds a subtle nutty flavor that pairs beautifully with the spicy sauce. Rolling the tortillas tightly ensures the burrito stays intact during baking. The tortillas also provide a modest carbohydrate boost, rounding out the meal’s macro profile. If you prefer a gluten‑free option, consider using corn tortillas, though the texture will differ slightly.
Everything's prepped? Good. Let's get into the real action. The combination of textures and flavors is about to come alive, and each step will add a layer of complexity that will keep you engaged. The method is straightforward, yet each moment is an opportunity to refine the taste. Whether you’re cooking for yourself or entertaining friends, this process will become a ritual you look forward to. Keep your eyes on the clock; the timing is crucial for that perfect crisp. And remember, the best part is that you can tweak it to suit your taste. Let’s roll up our sleeves and dive in.
The Method — Step by Step
- Preheat your oven to 375°F (190°C). Line a baking sheet with parchment paper to prevent sticking. This step ensures even heat distribution, which is essential for crisp edges. The oven’s consistent temperature will help the cheese melt uniformly. If you’re using a convection setting, reduce the temperature by 25°F. This small tweak can prevent over‑browning.
- In a large mixing bowl, combine the shredded chicken, buffalo sauce, and Greek yogurt. Stir until the chicken is fully coated, making sure no dry patches remain. The yogurt will act as a binder, keeping the filling moist. If the mixture feels too thick, add a splash of water or a little more sauce. This step is where the flavor truly begins to develop. Feel the texture as it smooths out.
- Sprinkle the garlic powder, smoked paprika, salt, and pepper over the mixture. Toss again to distribute the spices evenly. The spices will infuse the chicken with depth and aroma. You’ll notice a subtle aroma that signals the dish is approaching perfection. This is the moment you can taste the future flavor. The spices also help balance the heat.
- Lay a tortilla flat on a clean surface. Spoon an even layer of the chicken mixture onto the center, leaving a 1-inch border. This technique ensures each bite has the same ratio of filling to tortilla. Spread the mixture gently, but don’t overfill. The filling should be snug but not cramped. The border prevents the filling from spilling during rolling.
- Sprinkle shredded cheddar over the filling. The cheese will melt into the mixture, creating a gooey texture that binds everything together. Watch the cheese begin to melt as you roll the burrito. This is the point where the burrito starts to feel like a complete unit. The cheese also adds a savory counterpoint to the heat.
- Fold the sides of the tortilla inwards, then roll tightly from the bottom. The roll should be firm enough to hold its shape. If it feels loose, roll a little tighter. This step seals the filling inside, preventing leaks during baking. The tightness also helps the tortilla crisp up evenly. Keep rolling until the burrito is fully sealed.
- Place the rolled burritos seam‑side down on the prepared baking sheet. Ensure they’re spaced apart to allow heat circulation. This spacing prevents steaming and promotes crispness. The burritos should sit flat to avoid uneven cooking. The oven’s heat will brown the tortilla edges. Watch the edges turn a golden amber.
- Bake for 12–15 minutes, or until the tortillas are golden and the cheese is bubbling. Flip halfway through to ensure even browning. The cheese should be slightly browned, indicating a perfect melt. If you prefer a darker crust, bake an additional minute or two. The internal temperature should reach 165°F (74°C). This step seals the flavors together.
- Remove the burritos from the oven and let them rest for 2 minutes. This allows the cheese to set slightly, making slicing easier. Resting also lets the flavors meld. Slice each burrito in half for easier handling. Serve immediately while the cheese is still melty. Garnish with a sprinkle of fresh cilantro or a squeeze of lime for brightness. The final touch elevates the dish to restaurant quality.
That's it — you did it. But hold on, I've got a few more tricks that'll take this to another level. The next section will reveal insider tips that fine‑tune the texture, flavor, and presentation. These are the little adjustments that separate a good meal from a legendary one. Keep reading, and you'll master the art of the high‑protein burrito. You'll also learn how to keep the heat at just the right level. And if you’re hungry for more, the variations will keep your taste buds dancing. Let's keep the momentum going.
Insider Tricks for Flawless Results
The Temperature Rule Nobody Follows
Many people bake at a high temperature to get a quick crisp, but this often results in uneven cooking. The trick is to bake at a moderate 375°F (190°C) and then finish with a quick burst of 425°F (218°C) for the last 2 minutes. This approach ensures the tortilla crisps without burning the filling. It also allows the cheese to melt smoothly. I once tried the high‑heat method and ended up with a rubbery cheese layer. That was a hard lesson. The moderate bake is the sweet spot for texture and flavor. Try it and taste the difference.
Why Your Nose Knows Best
The aroma of a well‑baked burrito is a reliable indicator of doneness. When the cheese starts to bubble and the tortilla edges turn a golden amber, the smell will intensify. Trust your nose; it’s a seasoned judge. I’ve watched the scent rise and felt the anticipation. The aroma signals the cheese is perfectly melted. This sensory cue saves you from over‑cooking.
The 5-Minute Rest That Changes Everything
Letting the burrito rest for 5 minutes after baking allows the filling to settle, making slicing cleaner. The cheese re‑solidifies slightly, preventing it from oozing onto the plate. A quick rest also lets the flavors mingle, enhancing the overall taste. I used to skip this step and ended up with a messy mess. The rest is a small investment for a cleaner experience. Give it a try next time.
Keep the Fillings Moist, Not Wet
Excess moisture can cause the tortilla to become soggy. To avoid this, pat the chicken dry before mixing with sauce. This simple step keeps the texture light. I used to let the chicken sit in its juices, and the burritos were soggy. Drying them out solved the issue. The result is a crisp exterior with a moist interior. Your burrito will thank you.
The Quick Oil Brush for Extra Crunch
Lightly brushing the outside of the burrito with olive oil before baking creates a golden, crisp exterior that mimics a fried texture. The oil also helps the cheese melt evenly. I’ve tested this hack, and the difference is noticeable. The burrito feels like a gourmet treat. The crunch is satisfying. It’s a simple step that elevates the dish.
Add a Fresh Cilantro Finish
A sprinkle of fresh cilantro adds a bright, herbal note that balances the heat. Cilantro also adds a pop of color that makes the dish visually appealing. I always add it right before serving. The fresh herb brings a new layer of flavor. It’s a finishing touch that turns a good burrito into a great one. Give it a try.
Those are the tricks that turn a decent burrito into a culinary masterpiece. Each one is a small tweak that amplifies the overall experience. I’ve tested each tip and can attest to the difference it makes. Remember, practice makes perfect, and the more you cook, the more intuitive these adjustments become. Keep experimenting, and you'll discover new nuances that suit your palate. Now, let’s explore how you can take this recipe to new creative heights.
Creative Twists and Variations
Spicy Chipotle Twist
Swap the buffalo sauce for a chipotle‑infused sauce to bring a smoky heat. The chipotle adds a deep, earthy flavor that complements the cheddar. This variation is perfect for those who love a more complex spice profile. The result is a burrito that feels like a smoky campfire dinner. Pair it with a side of black beans for a complete meal. Your taste buds will thank you.
Vegan Edition
Use a plant‑based buffalo sauce and a dairy‑free cheese substitute. Replace the chicken with shredded jackfruit or tempeh for a hearty protein source. The vegan version maintains the same creamy texture and spicy kick. It’s a great option for those following a plant‑based diet. The flavor remains bold and satisfying. Try it next week.
Mediterranean Flair
Introduce a drizzle of tzatziki and a sprinkle of feta instead of cheddar. The cool, cucumber yogurt balances the heat, while feta adds a briny depth. This twist transforms the burrito into a Mediterranean‑inspired dish. It’s ideal for a light lunch or dinner. The flavors play off each other beautifully. The end result is refreshing and delicious.
Breakfast Burrito Boost
Add a fried or poached egg into the filling before rolling. The runny yolk creates a rich, velvety sauce that coats the tortilla. This version is a breakfast powerhouse, combining protein and carbs for a balanced start. Pair it with a side of fresh fruit to complete the meal. The egg adds a new dimension to the texture. It’s a game‑changer for morning cravings.
Pesto Power
Swap the buffalo sauce with a basil pesto for a herbaceous twist. The pesto brings a fresh, green flavor that contrasts the cheddar. This version is lighter but still packed with protein. It’s an excellent choice for a spring or summer meal. The pesto also adds a vibrant color that makes the dish visually appealing. Give it a try when you crave something new.
Loaded Taco Burrito
Layer shredded lettuce, diced tomatoes, and a dollop of guacamole before sealing the burrito. The fresh vegetables add crunch and juiciness. The guacamole provides a creamy, cooling element that balances the heat. This variation turns the burrito into a taco‑inspired delight. It’s perfect for a party or a casual family dinner. The combination of textures will keep everyone coming back for more.
This recipe is a playground. Here are some of my favorite ways to switch things up. Whether you want to experiment with flavors, adapt it for dietary preferences, or simply add a new twist, these variations will keep the dish exciting. Each option maintains the high‑protein, low‑calorie focus while offering a fresh take. Feel free to mix and match elements from different variations. The world of burritos is vast, and the possibilities are endless. Have fun exploring these creative twists.
Storing and Bringing It Back to Life
Fridge Storage
Store assembled burritos in an airtight container in the refrigerator for up to 3 days. The low‑calorie tortillas hold up well without becoming soggy. Keep the burritos on a rack if you want to preserve crispness. If you prefer a softer texture, reheat them in the oven rather than the microwave. The microwave can cause the cheese to separate. Use a damp paper towel to keep the burrito moist during reheating.
Freezer Friendly
Wrap each burrito tightly in foil before placing it in a freezer bag. They remain fresh for up to 2 months. Freeze before baking to keep the tortillas from becoming too soft. When ready to eat, bake at 375°F (190°C) for 20 minutes. The cheese will melt again, and the tortilla will regain its crispness. The foil prevents freezer burn and preserves flavor. This is the best way to keep a ready‑to‑cook meal.
Best Reheating Method
The oven is the gold standard for reheating; it restores the crispy exterior and melty interior. Preheat to 350°F (175°C) and bake for 10–12 minutes. If you’re in a hurry, use a toaster oven for a quick, even heat. The microwave is a last resort; it can leave the tortilla soggy. Add a splash of water before microwaving to create steam that keeps the filling moist. Reheat one burrito at a time for even results.
Add a tiny splash of water before reheating — it steams back to perfection. The moisture helps the cheese re‑melt without drying out. The result is a burrito that feels freshly baked. These tips will keep your burritos tasting like they just left the oven. Whether you’re prepping for a busy week or a spontaneous dinner, these storage hacks have you covered. Enjoy the convenience without compromising flavor.