I was in the middle of a chaotic Sunday dinner when my sous‑chef, a lanky teenager who had never cooked more than instant noodles, decided to “spice things up” with a handful of garlic cloves and a can of parmesan. The kitchen was a battlefield of garlic aroma, butter sizzle, and the faint scent of almond flour drifting from the pantry. I watched him toss a chicken breast into a pan that was already hot, and the sound of the meat searing was like a drumbeat in a jazz club. The moment the first golden crust formed, I knew I had stumbled on something that would become a staple in my culinary repertoire.
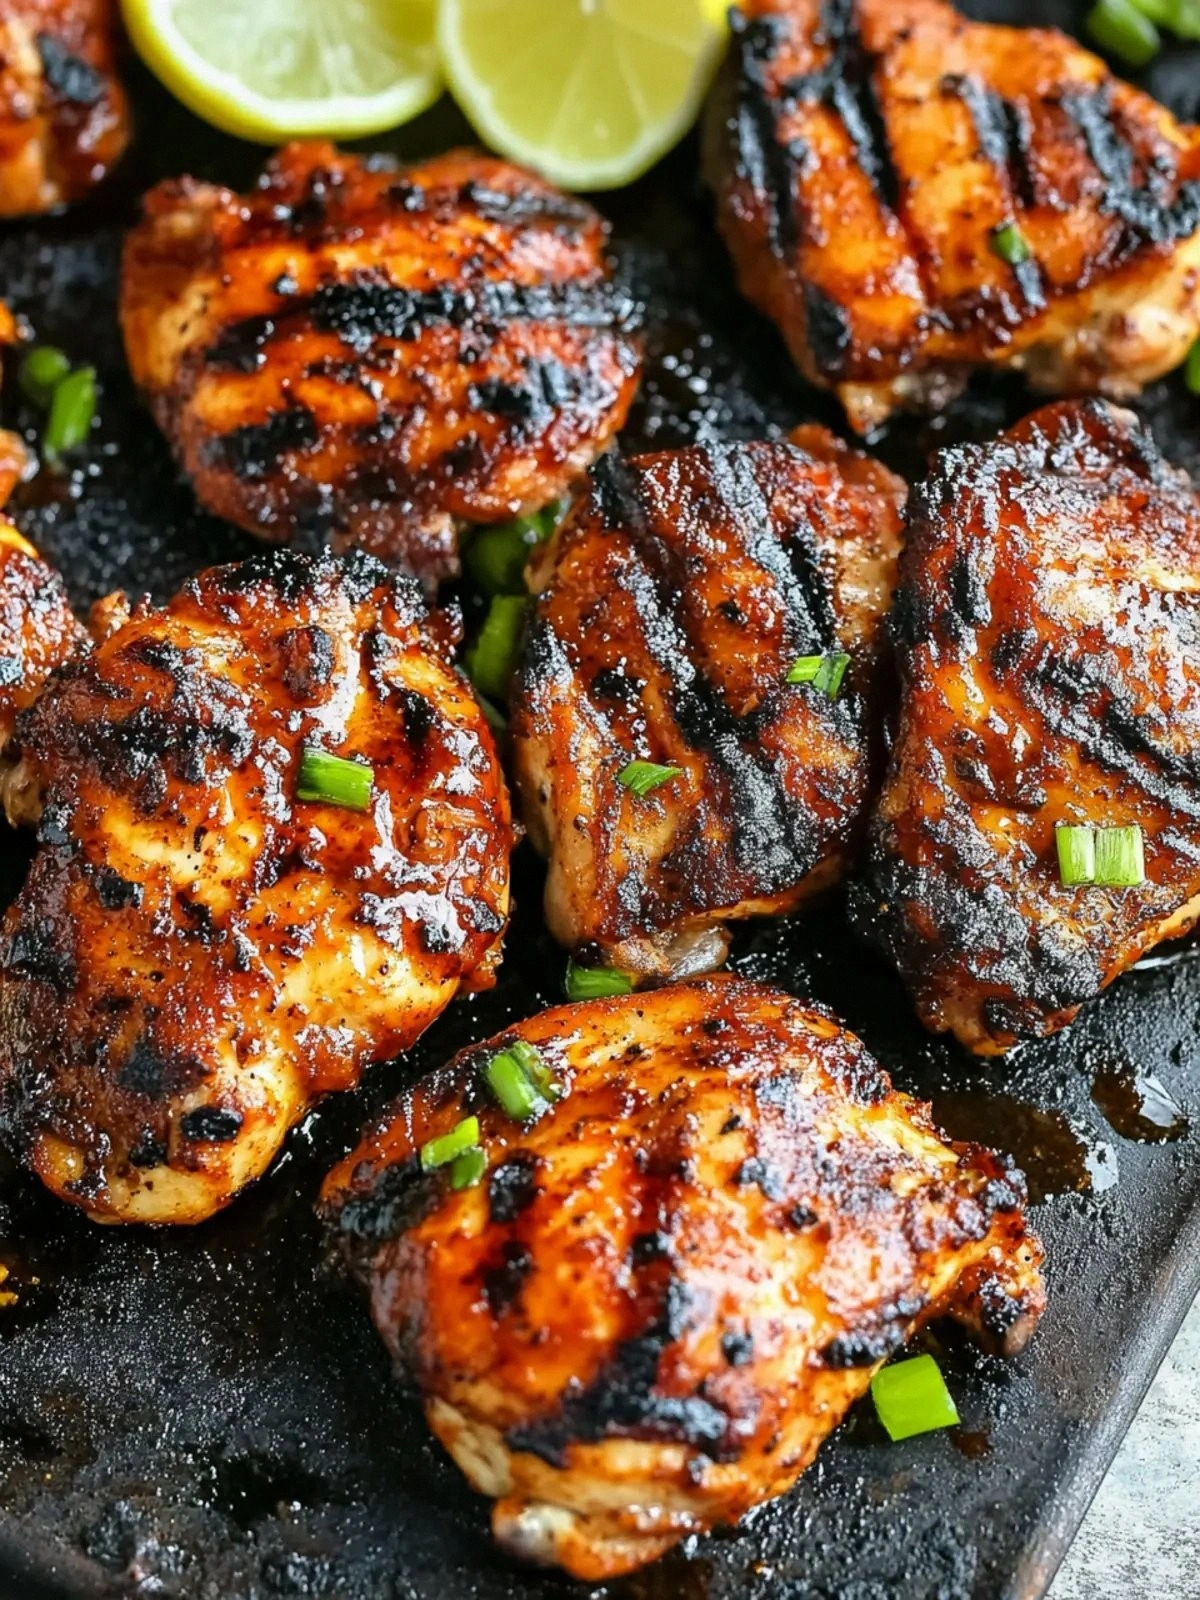
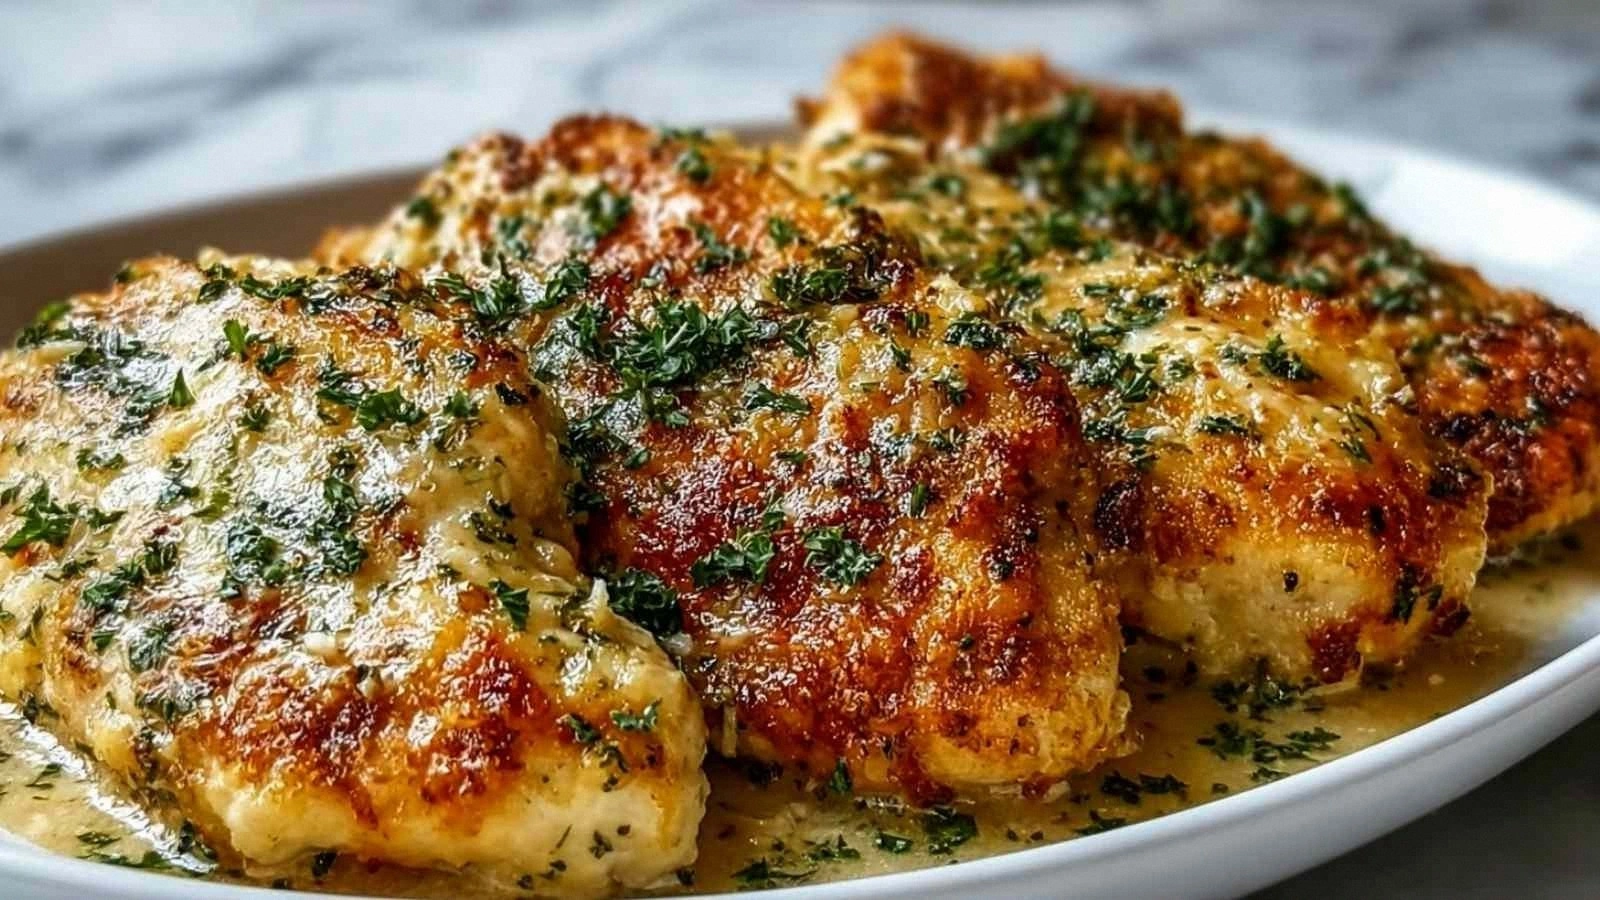
Picture this: a plate of tender, juicy chicken, its surface kissed by a buttery, garlic‑laden crust that crackles like a crisp autumn leaf. The Parmesan coating glistens, offering a salty, nutty finish that balances the mildness of the chicken. A sprinkle of fresh parsley adds a pop of color and a whisper of herbal brightness. The dish is both comforting and sophisticated, the kind that makes you feel like a chef in your own kitchen. And the best part? It’s keto‑friendly, low‑carb, and requires only a handful of pantry staples.
This version stands apart from every other chicken‑parmesan recipe I’ve tried because of its meticulous balance of flavor, texture, and simplicity. I’ve taken the classic concept of garlic parmesan chicken and refined it into a version that delivers a buttery, crispy exterior while keeping the inside moist and succulent. The secret lies in the blend of almond flour and parmesan, which creates a crunchy shell that doesn’t dry out the meat. I dare you to taste this and not go back for seconds. The first bite should have you saying, “I’ve never made something this good at home.”
But the real kicker is the unexpected twist: a splash of fresh lemon juice at the end that brightens the dish without breaking the keto line. That bright zing lifts the richness, turning the meal into something that feels light yet indulgent. It’s the kind of dish that will have your friends begging for the recipe after you’ve already finished your plate. Stay with me, because by the end of this post you’ll wonder how you ever cooked chicken without this exact technique.
Let me walk you through every single step — by the end, you’ll wonder how you ever made it any other way. From selecting the right cut of chicken to mastering the pan‑searing technique that gives you that perfect, crispy edge, I’ll share every micro‑challenge and bold claim that makes this recipe a kitchen triumph. If you’ve ever struggled with chicken that falls apart or ends up dry, you’re not alone — and I’ve got the fix.
What Makes This Version Stand Out
- Flavor: The combination of garlic powder, onion powder, and paprika creates a savory base that feels like a warm hug. The parmesan provides depth, while the lemon brightens the finish. Every bite is a harmonious blend of umami and citrus.
- Texture: The almond flour coating crisps into a buttery shell that cracks delightfully when you bite into it. The chicken stays moist inside, a contrast that keeps you coming back for more.
- Convenience: With just nine ingredients, this dish is a one‑pan wonder. No fancy gadgets, no elaborate prep — just a few quick steps and you’re ready to serve.
- Low‑Carb, Keto‑Friendly: Replacing wheat flour with almond flour keeps carbs low while still delivering that satisfying crunch. The dish fits perfectly into any keto or low‑carb plan.
- Crowd‑Pleaser: Whether you’re hosting a dinner party or cooking for a family, the rich, savory flavor profile appeals to both kids and adults alike.
- Ingredient Quality: Using fresh, high‑quality parmesan and real butter elevates the dish beyond a standard takeout copycat.
- Make‑Ahead Potential: The chicken can be prepared in advance, refrigerated, and reheated without losing its crunch or moisture.
- Visual Appeal: The golden crust and bright parsley garnish make the dish Instagram‑ready, adding a pop of color that’s hard to resist.
Alright, let's break down exactly what goes into this masterpiece...
Inside the Ingredient List
The Flavor Base
The garlic powder and onion powder are the backbone of the flavor. They infuse the chicken with a subtle, savory depth that complements the richness of the butter and parmesan. Skipping them would leave the dish bland and flat, lacking the aromatic complexity that makes it memorable.
If you prefer a fresher garlic hit, substitute half a teaspoon of minced fresh garlic for the garlic powder. The result is a sharper, more vibrant flavor, but be cautious—fresh garlic can burn quickly in butter, so lower the heat slightly.
Paprika adds a gentle smoky undertone and a pop of color. A pinch of smoked paprika can transform the dish into a smoky, savory experience, perfect for a cozy winter evening.
The Texture Crew
Almond flour is the star of the texture crew. It gives the coating a delicate crunch that holds up against the butter’s richness. It also keeps the dish low in carbs, aligning with keto principles.
If you’re allergic to nuts, you can replace almond flour with coconut flour. Use half the amount, as coconut flour absorbs more moisture, and add a tablespoon of ground flaxseed to help bind the coating.
The butter is the binding agent that brings everything together. It melts into a silky sauce that coats the chicken, preventing the coating from sticking to the pan and ensuring a golden finish.
The Unexpected Star
Parmesan cheese isn’t just a topping; it’s an integral component that provides a salty, nutty flavor that lingers on the palate. The cheese’s fat content helps create a glossy, caramelized crust when heated.
If you’re on a stricter keto plan, you can use a low‑fat parmesan alternative, but be aware that the texture may be slightly less buttery. A pinch of nutritional yeast can also add a cheesy depth without the dairy.
The Final Flourish
Fresh parsley adds a burst of color and a herbal brightness that cuts through the richness of butter and cheese. It’s the garnish that turns a simple dish into a feast for the eyes.
If you’re out of parsley, a splash of fresh basil or a sprinkle of chopped chives works beautifully, offering a slightly different aromatic profile.
Everything’s prepped? Good. Let’s get into the real action...
The Method — Step by Step
- Begin by patting the chicken breasts dry with paper towels. This step is crucial because excess moisture will prevent the coating from crisping. Once the breasts are dry, season both sides with a pinch of salt and pepper. This simple seasoning step ensures the flavors penetrate the meat.
- In a shallow bowl, combine the almond flour, garlic powder, onion powder, paprika, and a pinch of salt. Mix until the spices are evenly distributed. This dry mix will form the crunchy coating that holds the butter and cheese together.
- In another bowl, whisk together the grated parmesan cheese and the lemon zest. The lemon zest brings a bright citrus aroma that will be released when the chicken hits the pan. It also adds a subtle zing that cuts through the richness.
- Take each chicken breast and first coat it in the almond flour mixture, pressing gently to adhere. Then dip it into the parmesan mixture, ensuring every surface is covered. The double coating creates a layered texture: the almond flour provides crunch, while the parmesan adds flavor.
- Heat a large skillet over medium heat and add two tablespoons of butter. Let the butter melt until it starts to foam but before it turns brown. This temperature ensures the coating sears without burning.
- Place the coated chicken breasts in the skillet, skin‑side down if they have skin. Let them cook for 4–5 minutes until the crust is golden brown and the edges begin to pull away from the pan. This is the moment of truth; the sizzle should be audible, a sign of proper searing.
- Flip the chicken and reduce the heat to medium‑low. Cook for another 5–6 minutes, or until the internal temperature reaches 165°F (74°C). The butter will continue to melt, creating a silky sauce that coats the chicken.
- While the chicken finishes cooking, melt the remaining butter in a small saucepan. Add the lemon juice and stir until the mixture is glossy. Drizzle this lemon‑butter sauce over the chicken, allowing it to soak in for a minute.
- Remove the skillet from heat, sprinkle chopped parsley over the top, and let the dish rest for 2 minutes. This brief rest lets the juices redistribute, ensuring each bite is juicy and flavorful.
- Serve immediately with a side of steamed asparagus or a fresh salad. The dish’s buttery richness pairs beautifully with crisp greens, creating a balanced plate that satisfies both taste buds and nutritional goals.
That’s it — you did it. But hold on, I've got a few more tricks that'll take this to another level. From adjusting the lemon juice for a sharper finish to mastering the exact temperature for the butter, the next section will give you the edge you need to impress even the most discerning palates.
Insider Tricks for Flawless Results
The Temperature Rule Nobody Follows
Many cooks instinctively turn the heat up to get a quick sear, but the key to a buttery crust is medium heat. If the pan is too hot, the butter will burn and the coating will taste acrid. Keep the heat steady, and watch for the butter to foam gently—this signals the right temperature.
Why Your Nose Knows Best
Your nose is your best ally when cooking. A faint, nutty aroma means the parmesan is caramelizing perfectly. If you notice a sharp, burnt smell, lower the heat immediately. Trust your senses, and you’ll avoid culinary mishaps.
The 5‑Minute Rest That Changes Everything
Letting the chicken rest for 5 minutes after cooking is a game‑changer. It allows the juices to redistribute, so every bite stays moist. I once served chicken that was still searing in the pan; the result was dry, flavorless meat. The rest period fixes that.
Double‑Coating Magic
If you want an extra crispy crust, dip the chicken in beaten egg before the almond flour coating. The egg acts as a glue, helping the coating adhere and giving a golden, crunchy finish. This technique is especially useful for thicker cuts.
Lemon‑Butter Finish for a Fresh Twist
A splash of lemon juice at the end brightens the dish without adding carbs. If you prefer a more pronounced citrus note, add a tablespoon of fresh lemon zest to the sauce. The bright flavor lifts the richness of the butter and parmesan.
Storing for Later
If you’re making this ahead of time, let the chicken cool completely before refrigerating. Store in an airtight container for up to 3 days. Reheat in a skillet over medium heat, adding a splash of water to keep the coating from drying out.
Creative Twists and Variations
This recipe is a playground. Here are some of my favorite ways to switch things up:
Spicy Cajun Kick
Add 1 teaspoon of Cajun seasoning to the almond flour mix and sprinkle a pinch of cayenne pepper over the finished dish. The heat pairs beautifully with the buttery coating, making it perfect for a summer BBQ.
Herb‑Infused Delight
Swap the parsley for a mix of fresh thyme and rosemary. The earthy herbs give the dish a Mediterranean vibe, ideal for a cozy dinner.
Cheesy Broccoli Blend
Top the chicken with steamed broccoli and a drizzle of melted cheddar. The extra cheese adds a gooey texture while keeping the dish keto‑friendly.
Creamy Alfredo Finish
After searing, pour a splash of heavy cream into the pan and let it simmer for a minute. Stir in a tablespoon of grated parmesan for a rich, silky sauce that coats the chicken.
Coconut‑Lime Twist
Replace the almond flour with shredded coconut and add lime zest to the parmesan mix. The tropical flavors create a bright, summery version of the classic dish.
Sausage & Parmesan Fusion
Slice Italian sausage and sear it with the chicken. The sausage’s spices mingle with the parmesan coating, turning the dish into a hearty, savory entrée.
Storing and Bringing It Back to Life
Fridge Storage
Cool the chicken completely before placing it in an airtight container. Store in the refrigerator for up to 3 days. The coating may soften slightly, but a quick pan‑sear will restore its crispness.
Freezer Friendly
Wrap each chicken breast individually in parchment paper and then in plastic wrap. Freeze for up to 2 months. Thaw overnight in the refrigerator before reheating.
Best Reheating Method
Reheat in a skillet over medium heat, adding a tablespoon of water to create steam. Cover the pan for 2 minutes to keep the coating moist and restore the buttery glaze. A tiny splash of water before reheating steams the dish back to perfection.