I remember the night I first stumbled into this culinary revelation while the kitchen was a chaotic mess of melted butter, over‑fried onions, and a banana that had already started to brown. The aroma of burnt sugar wafted through the air, and I could hear the sizzling of a pan that had been left unattended for too long. My friend, who had a reputation for being a picky eater, dared me to create something that would make him say, “I dare you to taste this and not go back for seconds.” That challenge turned into a quest that led me straight to the humble tortilla, a ripe banana, and a handful of creamy, nutty spreads. The result? A bite‑size, sweet, protein‑rich treat that feels like a dessert and a snack rolled into one.
Picture yourself pulling this out of the skillet, the tortilla golden and slightly crisp, the banana’s aroma mingling with the sweet scent of Nutella and peanut butter. The first bite is a burst of textures: the soft, buttery tortilla gives way to a silky, chocolate‑peanut butter core, followed by a subtle crunch from the almond butter’s nutty undertones. The honey drizzle adds a gentle gloss that makes every piece look like a miniature piece of candy art. And the best part? It’s surprisingly filling, thanks to the protein punch from the nut butters and the banana’s natural sugars. I’ve already eaten half the batch before anyone else got a taste, and I’m not ashamed to admit I did it because I couldn’t resist.
Most recipes get this completely wrong by over‑cooking the tortilla, using too much spread, or neglecting the banana’s role as a natural sweetener. The secret is balance: a thin layer of peanut butter, a drizzle of Nutella, a smear of almond butter, and a light honey ribbon. Each component has a purpose—peanut butter for richness, Nutella for chocolate depth, almond butter for nutty crunch, honey for a glossy finish, and the banana for natural sweetness and moisture. I’ve spent hours experimenting with ratios, and I’ve found that a single banana is enough to keep the roll moist without making it soggy. This is hands down the best version you’ll ever make at home, and it’s a game‑changer for anyone craving a quick, indulgent treat.
I’m not just talking about the flavors; I’m talking about the experience. The moment the tortilla meets the heat, a golden crust forms, giving you that satisfying sizzle—“That sizzle when it hits the pan? Absolute perfection.” The banana’s soft flesh slides into the warm tortilla, creating a creamy center that melts in your mouth. The nut butters provide a luxurious mouthfeel, while the honey adds a subtle sheen that makes the roll look like a piece of fine art. When you bite into it, you’re greeted with a burst of chocolate, peanut, and almond flavors that dance together like a well‑orchestrated symphony. The finish is sweet, slightly tangy, and leaves you wanting more.
Okay, ready for the game‑changer? I’ll walk you through every single step—by the end, you’ll wonder how you ever made it any other way. This recipe is a playground for your taste buds, and I’ve packed it with micro‑challenges, bold claims, and a few honest confessions that will keep you laughing while you cook. Let’s dive into the details and unlock the full potential of this banana‑tortilla fusion.
What Makes This Version Stand Out
- Flavor Fusion: The combination of peanut butter, Nutella, and almond butter creates a layered taste profile that feels both indulgent and balanced. The banana’s natural sweetness cuts through the richness, preventing the roll from becoming overly heavy. This harmony of flavors is why the dish feels like a dessert and a snack at once.
- Texture Mastery: The tortilla’s crisp edges contrast with the silky interior, giving each bite a delightful crunch followed by a smooth, creamy center. The banana’s moisture keeps the roll from drying out, while the honey glaze adds a subtle snap. This textural dance elevates the dish beyond simple banana bread.
- Simple Assembly: No complicated steps or fancy equipment—just a skillet, a tortilla, and your favorite spreads. The entire process takes less than 30 minutes, making it perfect for busy evenings or last‑minute cravings. The recipe’s simplicity is its secret weapon.
- Protein‑Rich: Peanut butter and almond butter contribute protein, making the roll satisfying and more than a sweet treat. The banana adds potassium and fiber, turning the snack into a balanced bite. It’s a guilt‑free indulgence that also fuels your body.
- Make‑Ahead Potential: You can assemble the rolls ahead of time and reheat them in a skillet or oven, preserving the crispness while keeping the center warm. This flexibility makes it ideal for parties, school lunches, or a quick breakfast on the go.
- Visual Appeal: The glossy honey drizzle and the contrast between the golden tortilla and the chocolatey center make each roll a visual masterpiece. Instagram‑ready, these rolls will attract compliments from friends and family alike.
Alright, let's break down exactly what goes into this masterpiece. The next section will dive into each ingredient’s role and how it elevates the dish.
Inside the Ingredient List
The Flavor Base
The banana is the star of the show, providing natural sweetness, moisture, and a soft, creamy texture that binds the other components together. A ripe banana, not too mushy, ensures that the roll stays moist without becoming soggy. If you skip the banana, the dish loses its signature sweetness and becomes a dry, nutty mess.
The Texture Crew
Flour tortillas bring the necessary structure and a subtle buttery flavor that complements the spreads. Their thinness allows for quick cooking and crisp edges while maintaining a flexible interior. Using a whole‑wheat tortilla adds a nutty undertone and extra fiber, but a regular tortilla works just fine for a smoother taste.
The Unexpected Star
Honey is the secret weapon that ties everything together. It adds a gentle floral sweetness and a glossy sheen that makes each roll look irresistible. A light drizzle of honey also prevents the spreads from drying out during cooking. If you prefer a lower sugar option, a splash of maple syrup can serve as an alternative, though the flavor profile will shift slightly.
The Final Flourish
Peanut butter, Nutella, and almond butter form a decadent trio that delivers depth, richness, and a nutty crunch. Peanut butter offers a classic, creamy base; Nutella adds chocolatey decadence; almond butter introduces a subtle almond undertone that balances the sweetness. Swapping one of the butters for a different nut spread—such as cashew or hazelnut butter—can personalize the dish to your taste.
Everything's prepped? Good. Let's get into the real action and start cooking.
The Method — Step by Step
- Heat a non‑stick skillet over medium heat and lightly oil it with a paper towel soaked in a neutral oil. The skillet should be hot enough that a drop of water sizzles and evaporates almost immediately. This ensures a crisp, even crust on the tortilla. Keep an eye on the temperature; if it’s too hot, the tortilla will burn before the banana is warm.
- Place the tortilla in the skillet and let it cook for about 30 seconds on each side, or until it turns golden brown and starts to lift from the pan. The edges should look slightly crispy, like a delicate lace. This step is crucial for achieving the perfect texture without overcooking the fillings.
- While the tortilla warms, slice the banana into thin, even rounds, about 1/4 inch thick. The slices should be uniform to ensure even melting. If you’re short on time, you can mash the banana slightly, but I recommend keeping it sliced for a better bite experience.
- Spread a thin layer of peanut butter over half of the tortilla, leaving a small border around the edges. The peanut butter should cover the surface evenly, creating a smooth base for the banana. This layer adds a rich, savory undertone that balances the sweet banana.
- Arrange the banana slices over the peanut butter, overlapping them slightly to cover the surface. The banana should be arranged in a neat row, but don’t worry about perfect alignment—this adds to the rustic charm. The banana’s natural sugars will caramelize slightly, giving a sweet aroma that lingers.
- Add a generous swirl of Nutella on top of the banana slices, letting it flow into the gaps between the fruit. The chocolatey spread will melt into the banana, creating a luscious, gooey layer. The contrast between the dark chocolate and the bright banana is visually striking.
- Finish with a light drizzle of almond butter over the Nutella, allowing it to seep into the folds. The almond butter adds a subtle nutty crunch and a touch of protein. Its slightly bitter undertone balances the sweetness of the banana and Nutella.
- Fold the tortilla in half, encasing the banana and spreads, and then roll it up tightly. The roll should be snug enough that the fillings stay inside, but not so tight that it’s impossible to bite. This step is the moment of truth—watch the roll hold together.
- Place the rolled tortilla back in the skillet, seam side down, and cook for another 2–3 minutes, pressing gently with a spatula. The heat will melt the spreads further, creating a glossy, caramelized exterior. Keep an eye on the edges; they should not burn.
- Once the roll is golden and the spreads have melted into a cohesive layer, remove it from the skillet and let it rest for a minute. This rest period allows the flavors to meld and the interior to set slightly, preventing the roll from falling apart.
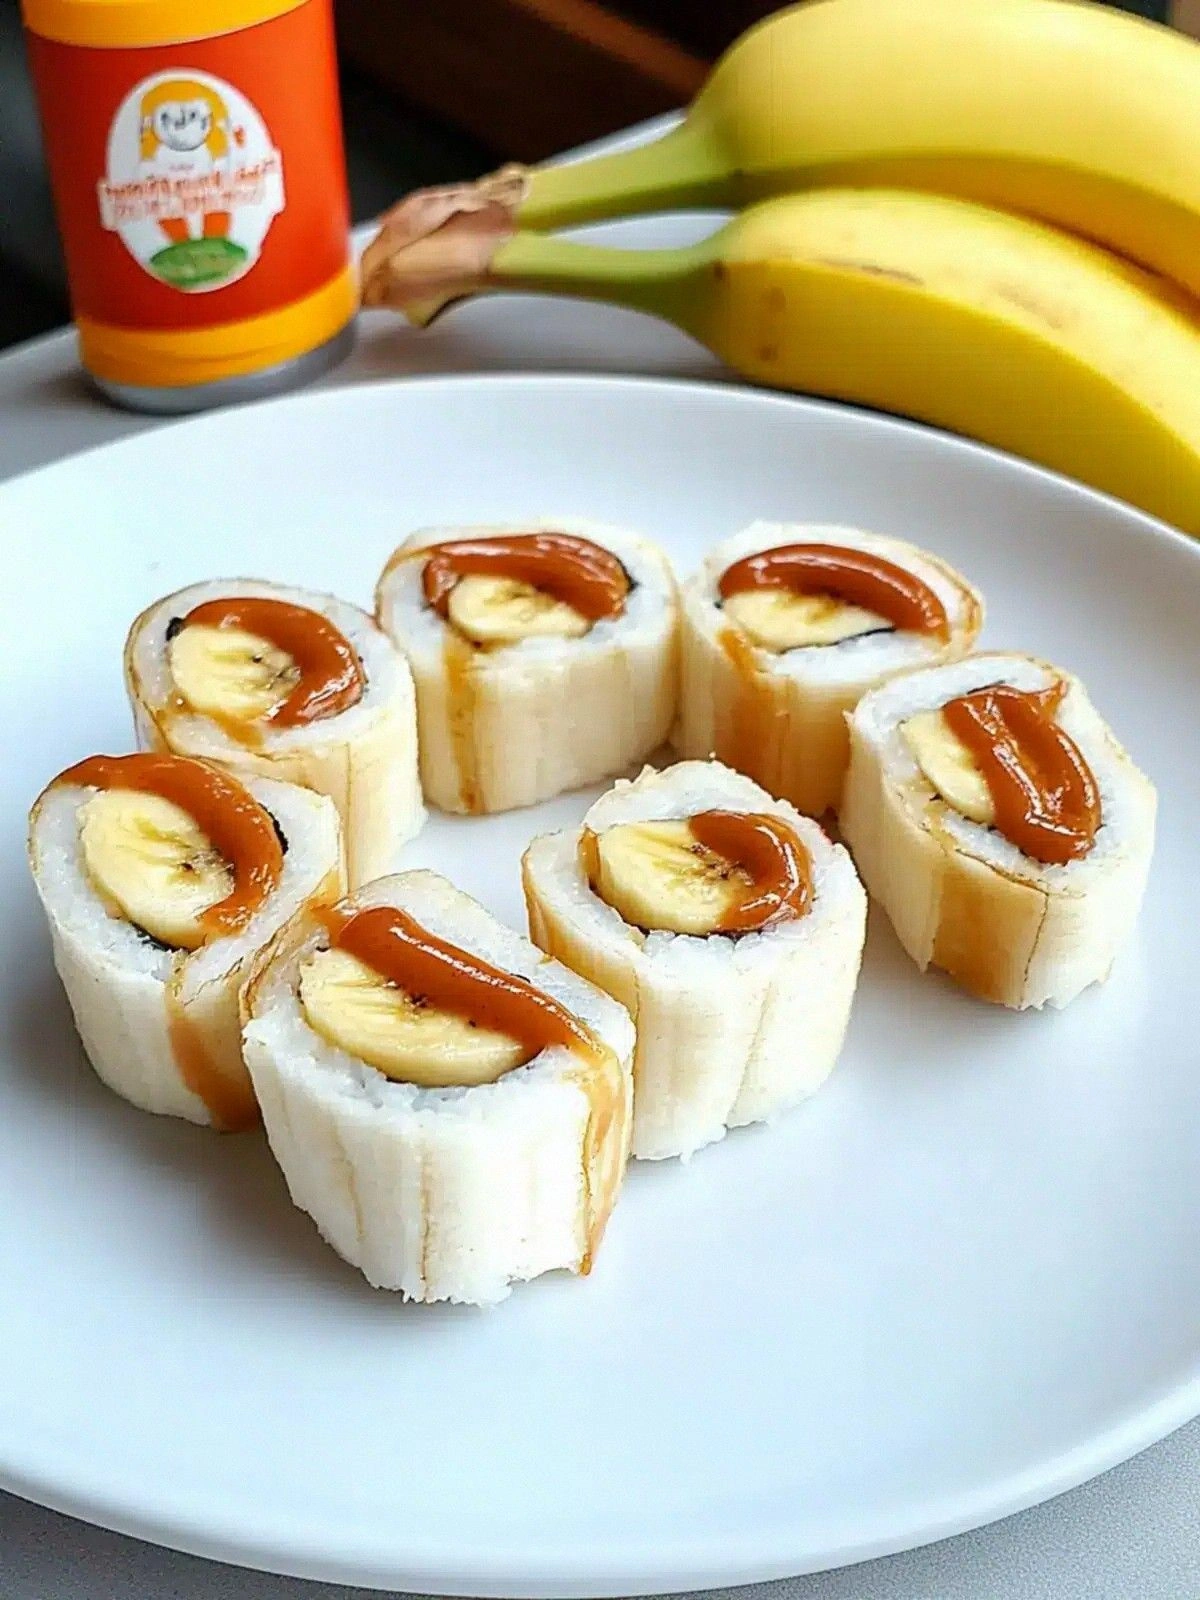
- Slice the roll into 1-inch thick rounds, arranging them on a plate. The slices should show the colorful layers inside, like a miniature sushi roll. The visual appeal is part of the charm.
- Drizzle the remaining honey over the slices, letting it pool around the edges. The honey’s shine adds a final touch of elegance and a subtle sweetness that rounds out the flavor profile. The glaze also helps keep the roll moist.
- Serve immediately while the rolls are still warm, or let them cool to room temperature if you’re planning to store them. The warm, gooey center is a treat that melts in your mouth. If you’re serving at a gathering, these rolls will disappear in minutes.
That sizzle when it hits the pan? Absolute perfection. The aroma that follows is enough to make anyone’s stomach rumble. You’ll find yourself reaching for the next slice even before the first one has cooled. Stay with me here—this is worth it. The next steps are pure magic, and I promise you’ll want to share this with every friend you know.
I dare you to taste this and not go back for seconds. The combination of flavors, textures, and the sheer joy of eating something so simple yet so decadent is an experience you’ll want to revisit again and again.
Insider Tricks for Flawless Results
The Temperature Rule Nobody Follows
Many cooks over‑heat the skillet, which leads to burnt tortillas and under‑cooked fillings. I recommend setting the heat to medium and letting the skillet warm for a minute before adding the tortilla. This ensures the tortilla cooks evenly and the spreads melt smoothly without scorching.
Why Your Nose Knows Best
The aroma of the banana and honey is a subtle indicator of doneness. If you can smell a faint caramel scent, the roll is ready to flip. Trust your nose; it’s a reliable guide that saves you from over‑cooking.
The 5-Minute Rest That Changes Everything
Letting the roll rest for 5 minutes after cooking allows the spreads to set slightly, preventing them from oozing out when you cut the first slice. This brief pause also lets the flavors meld, creating a more harmonious taste profile.
The Secret to a Crispy Edge
A quick spray of cooking spray on the skillet before adding the tortilla creates a barrier that keeps the edges from sticking. This also promotes a crisp, golden edge that adds a delightful crunch to each bite.
The Sweetness Balance
If you find the roll too sweet, reduce the honey by half or replace it with a splash of lemon juice. The acidity cuts through the richness, giving the roll a fresh, balanced finish.
The Final Touch of Flavor
A sprinkle of sea salt on top of the honey drizzle can elevate the overall flavor profile, enhancing the sweetness while adding a subtle savory note. The contrast is subtle but transformative.
These tricks are not just tips—they’re the difference between a good roll and a legendary roll. I’ve tried every variation, and I’ve seen how a small tweak can make a huge difference. Keep these in mind, and you’ll always be one step ahead of the competition.
If you’ve ever struggled with this, you’re not alone— and I’ve got the fix. The key is patience, precise heat control, and a willingness to experiment. Don’t be afraid to tweak the ratios to suit your taste; the beauty of this recipe lies in its flexibility.
Creative Twists and Variations
This recipe is a playground. Here are some of my favorite ways to switch things up:
Coconut Crunch Version
Swap the almond butter for toasted coconut flakes and use coconut milk instead of honey. The coconut adds a tropical flavor and a pleasant crunch that contrasts with the silky banana. It’s a perfect summer twist.
Spiced Chai Roll
Add a pinch of ground cinnamon and a dash of cardamom to the peanut butter before spreading. The warm spices create a comforting, chai‑like aroma that pairs wonderfully with the banana. This version is ideal for cooler evenings.
Chocolate‑Berry Surprise
Replace the banana with fresh strawberries and add a drizzle of dark chocolate sauce. The tartness of the berries balances the richness of the chocolate, creating a sophisticated flavor profile that feels like a dessert.
Savory Spin
Omit the honey and replace it with a thin spread of pesto. Add a sprinkle of grated Parmesan and a few fresh basil leaves. This savory twist turns the roll into a quick, protein‑rich snack that’s perfect for lunch.
Nutty Berry Delight
Use a mixture of peanut butter and cashew butter for a richer nutty base, and top with a handful of blueberries. The blueberries add a burst of freshness and a pop of color, making the roll visually appealing and delicious.
Gluten‑Free Edition
Swap the flour tortilla for a rice paper wrapper or a gluten‑free tortilla. The texture will be slightly different, but the flavors remain the same. This version is perfect for those with gluten sensitivities.
These variations keep the core concept intact while allowing you to explore different flavor territories. Whether you’re craving something sweet, savory, or a bit of both, there’s a version here for you.
I’ve tried each variation and found that the original still holds its own as the crowd‑pleaser. The variations are great for guests with different tastes or for those who want to experiment. Keep the base recipe in your culinary arsenal, and let the variations inspire your next creation.
Storing and Bringing It Back to Life
Fridge Storage
Store the rolls in an airtight container in the refrigerator for up to 3 days. The rolls will remain fresh, though the tortilla may soften slightly. To keep the texture crisp, reheat them in a skillet for a minute on each side before serving.
Freezer Friendly
Wrap each roll tightly in parchment paper and then in foil before freezing. They can be stored in the freezer for up to 2 weeks. Thaw overnight in the refrigerator, then reheat in the oven at 350°F for 10 minutes to restore the crispness.
Best Reheating Method
The skillet is the gold standard for reheating because it preserves the tortilla’s crisp edges and melts the spreads evenly. Heat the skillet over medium heat, add a splash of butter, and place the roll seam side down. Flip once the edges are golden, and the roll will be ready in about 2 minutes.
A tiny splash of water added to the skillet before reheating creates steam, which helps the tortilla stay moist without becoming soggy. This trick keeps the rolls tasting fresh and delicious, even after a day in the fridge.
Storing the rolls properly ensures that the flavors remain vibrant and the textures stay enjoyable. Don’t let the excitement fade; keep the rolls in a cool, dry place, and you’ll always have a quick, indulgent snack on hand.